a pair of shoes and socks
cell phone
glasses
flashlight
They need to be free from possible glass, which makes it quite tricky.
For my daughter's bed, she designed a bag which fit all those specs, and I attempted to engineer the details.
We started with the measurements of all the items and the arrangement she wanted to employ for storing them.
Then I roughed it out with paper and pencil. I then decided to try to learn to use the Google Documents drawing facility to lay it out. This "drawing" is not to scale, and should not be considered "final" in any way, but it is what I started with.
My daughter wanted to be able to hook it to her metal bed frame with velcro, OR to slide the "tails" at the top of the drawing under her mattress so it could hang on the side. (She also wanted an opening in the side of the cell-phone pocket (top left) so the charger cord could be attached at night. Personally, I think this is a potential fire hazard, so I hope she really won't do that, but I sewed it so she could.) Because she wanted to be able to hang it, the final length of the bag was also important. I don't yet know if it will drag on the floor, or on the bed when she hangs it--that is a measurement we did not have, so I just made it as short as possible given the other dimensions/requirements.
You can see that I am not accomplished with the drawing facility in G-Docs. I could not make the second row of words for the row of top pockets go where they needed to go, and I didn't have time to figure it out.
Doing the drawing actually helped nail down several of the cutting dimensions, so it was a good idea. I only had two small pieces of fabric left from a Japanese costume she had worn years earlier. I had to line both of the pockets with other fabric, and piece the back, but managed to do the entire project.
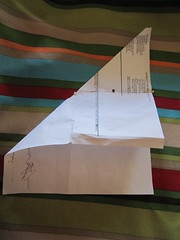
Then I set about engineering how to make the pocket for the shoes 4-inches deep (front to back). I started with paper and worked out how to miter the bottom corners to create a "box". These are my engineering examples! 
Fold and stitch on the line where the pins are (leave 3/4" open at the seam bottom (near the outside edge, or remove your stitches after the fact, like I did).
Second - Trim the mitered corner, leaving only 5/8-in. or so, so you can turn the corners when attaching it to the back. (In this photo, the corners are NOT trimmed.)
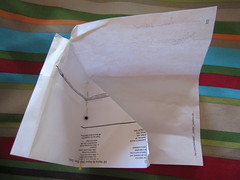
Third - turn right side out, pushing out corner. Fold seam allowance OUT to allow stitching raw edges together.
Engineering done, at least until I actually made the bag.
I attached a fairly light weight fusible backing to all of the patterned fabric. The insides of each pocket are fairly heavy, white duck cloth, no fusible backing required.
Fold the pockets in half if they are all the same fabric, or stitch the front and backs together and fold.
Serge around each pocket edge after they are ready to apply.
Make the miters in the bottom pocket, LEAVING the last 3/4" open at the edge!
Trim off all but the seam allowance.
(I serged those raw edges as far as possible with each side OPEN.)
Lay the "box" pocket on the bag backing, matching the three raw edges and creating a pleat on each side to make it fit the width. (The excess pocket width is helpful in fitting stuff into the pocket.)
Stitch down the side, around the bottom, and up the other side.
Do the upper pocket second, so you get the placement accurate. You must leave about an inch for sewing on the flap and getting things into and out of the pocket.
Stitch a seam down the left side of the upper pocket so it can be attached with a slit down the side.
Turn it to the right side.
Attach the upper pocket with a seam across the bottom, leaving the finished edge of the right side about 1-in. from the FINISHED edge of the bag backing. Insert pleats into each compartment, to make it the correct width and give each item sufficient room, matching the right raw edge to the right edge of the bag backing.
Stitch the seam.
Turn pocket UP and attach the right raw edge to the right edge of the bag backing.
Stitch up from the bottom for 1-1/2" on the left side.
Stitch down from the top for 1-1/2" on the left side, leaving a wide slit for inserting the cell phone cord.
Reinforce the ends of the each section of this stitching by some very close tight zig zag stitches.
Pin all of the pockets towards the center of the bag backing to keep them out of your stitching.
Fuse a piece of Heavy Weight fusible pellon to the back -- Cut this at least 3/4" smaller all the way around so it will NOT go into the row of stitching.
Fold the bag backing down over the whole thing.
Stitch down the upper inside seams and across the top.
Stitch down each side, turning the corners at the bottom, LEAVING at least 8-inches for turning the bag.
Turn the whole thing inside out.
Match the open ends of the bottom, fold under, and do a row of stitches very close to the edge across the open bottom.
I had intended to put some of the velcro on the actual pockets before attaching them. I am glad I didn't, as placement was easier to do when everything was attached. I was going to do the pockets before, and the flaps after--I am glad I didn't, even though it would have been easier to attach to the outsides of the pockets BEFORE they were attached to the bag backing.
I was also going to do the velcro on the back of the actual bag at the top on each side before applying the upper pocket flap. I forgot, and there was JUST ENOUGH room to do it after.
Then I attached the strap velcro, three strips on the upper pocket and flap (MEASURE for pocket width, pleats, and topstitching requirements!), and two on the lower pocket and flap.
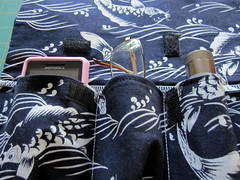
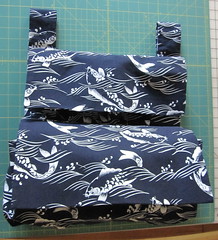
Then I used "Jeans" top-stitching thread to create the pockets on the upper row. I measured to allow sufficient space for each item and to avoid the velcro--very tricky placement involved--you have to think about that when you are putting on the velcro. You can see the top-stitching in the first photo.
It's done.
I don't think it would be very easy to follow what I did from this post unless you had quite a bit of experience and could do some engineering of your own, but I could be wrong. Hence I did not provide actual cutting measurements. They would need to be inferred from the finished sizes of everything in the drawing above.
The upper pocket was created to have a depth of 1-1/2 inches, but is a little more than that. The corners are not mitered since simple pleating can handle that.
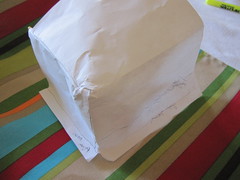
The lower pocket was created to have a depth of 4-Inches, and the only way I could sensibly achieve that was with the mitering I did. It did create quite a nice stiffish "box", due to the fusible backing on the patterned fabric, and the heavy weight of the duck cloth.
I tried to write it all my instructions, then typed it all into the drawing document. However, as I worked my way through it lots of things changed, and it would be pretty difficult to remember every tiny step and make a note of it properly.)
Photos:
Upper pocket, left side, showing the pockets "in use": cell phone, glasses, flashlight. The fourth pocket in that row may be used for whatever you like.
Each row of pockets must have "flaps", because you need to protect the contents from possible glass.
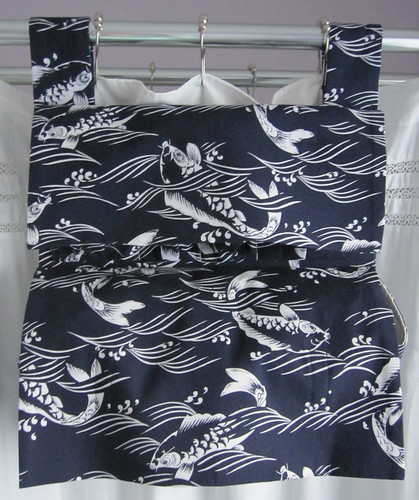
Showing bag with both pocket flaps UP; shoes are in bottom bag now. There is room for a water bottle in there as well if your shoes aren't too large. The total width of the bag COULD be a tad narrower for my shoes, hence the water bottle space.

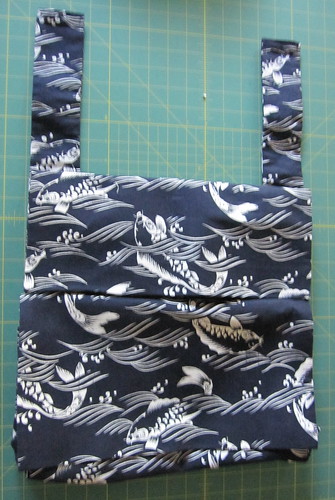
Flaps closed
She can hang it on her metal bed frame
Or lay the straps out flat under her mattress
I hope this all works out for her. I would not be excited to repeat the process, but it's possible.
No comments:
Post a Comment