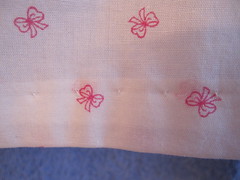
When I was in Tennessee last summer I picked up some beautiful voiles done by a local designer. I chose this one for my heirloom "practice".
I started with a "Project Runway" pattern that I could tell was not going to be exactly what I wanted, but it gave me some lines for tucks, so that's where I started. I have probably NEVER been so topsy turvy while trying to work my way through a project. I thought I would make a dress and repeat the effects around the hem, but it turned into a top as I bowed not-so-gracefully out of the bigger project.
I decided to run the lace and tucks all the way across one piece of fabric and put in the tucks as well before cutting--knowing that one panel was not sufficient for the entire project, so I would have to match what I had done on some more fabric.
I had to figure out which end would be the "top" and which the "bottom" so I could place my lace and tucks. I finally decided where to begin and then life got REALLY crazy.
After stitching the tiny insertion strip to the lace on each side I then attached the lace to the fabric using a TINY zig zag stitch so it would not overwhelm the delicate lace. (I could not find any "insertion" lace, to I could not serge the lace to the fabric, but I did serge the lace to the tiny insertion strip.) I pressed the tiny seams aside and then attached it to the fabric.
I then took it to my cutting table to begin the next phase and in the better light discovered the the tiny seams were on the OUTSIDE of the fabric!
I then spent about 5 hours removing two 45-in. wide rows of teeny tiny zig zag stitches. (I estimated I had removed about 2,250 stitches!) It has to be done stitch by stitch and VERY carefully or the lace would have been mutiliated.
I then re-attached the strip to the fabric, marked the tucks, and stitched them using embroidery thread to emphasize the unavoidable row of stitches. It looked really nice. I had also discovered that the tucks should not be symmetrically spaced with the lace. One side had to be deeper than the other so that when the tucks were in place they would be spaced properly with the lace strip.
About this time I abandoned the idea of making a dress, partly because I thought she would get more wear out of a top than a delicate dress that could not go to the playground, and partly because I decided it would take way too long to figure out where to place the bottom strip and tucks. This caused me to "turn around" where I was going to begin cutting. The result of that was that both rows of tucks had to be re-done so they would be running the opposite direction from where I had placed them. Fortunately the straight row of 2.5 stitches was fairly quickly removed, then I worked out where each tuck had to move to and re-stitched them!
NOW I was ready to place the pattern pieces on the fabric and work on the second section of insertion and tucks.
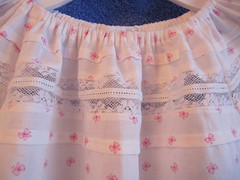
This is a section of the heirloom detail with everything in the right place and going the correct direction at long last!
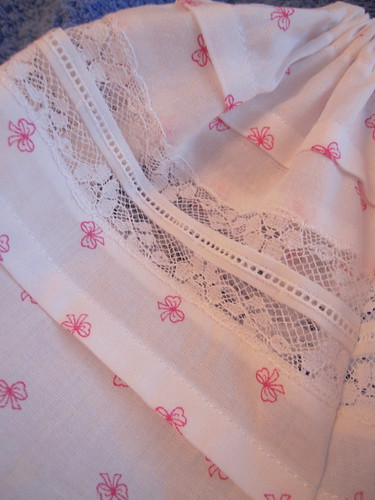
Bodice close-up
I forced myself to use the hemming foot on my sewing machine for the hem, as my regular method simply wasn't going to "fly" on an heirloom project. I could have hand stitched it and it would have been less obvious, but I decided I simply MUST master the hemming foot.
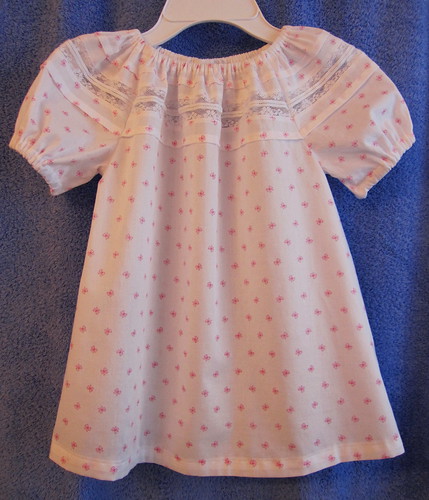
Finished top (and it may be the first AND the last such project I ever do....)
 201
201
When she first tried it on, she touched the lace and said, "I can see my SKIN!" (I think she was asking if that was ok. :-) She and her mommie love it.
No comments:
Post a Comment