We had to make a tee shirt for class, which I didn't want to do right now for myself. And we had to select one of four patterns. They only had one pattern in stock and it was only 4 days before class. We were supposed to cut out our garment before class, so I had to get that one. Let me say this, I am not now, nor have I ever been at any weight shaped like most Vogue patterns. So I wasn't happy right up front.
To keep our classes free, we are supposed to buy all of our supplies at the store, but I really do NOT wear the kinds of knits they had in stock--they were synthetics and I wear almost all cotton, except for dressy occasions. So I had to go to another store. Since I've been around a "while", let me just say, they don't SELL knits anywhere almost at all anymore--and yet most of what is in the retails stores is knit. Out of the measly selection I ended up with one with I might actually have liked if the pattern had been vertical and not horizontal. It is very light weight, almost all cotton, and does not have too much stretch--so that part was good.
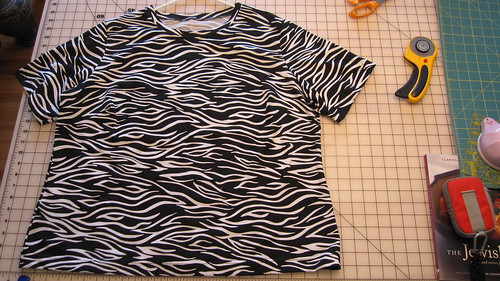
Here is the finished tee shirt. I'm not sure it will look any better on than it does off, but I'll probably wear it. (I did remember to push it over to the left in the "frame" of the photo, so it hopefully will not be chopped off by Blogger.)
As I am not shaped like a Vogue pattern, and especially not like this Vogue pattern, I really had to "mess" with the pattern before cutting it out. In the first place, I have not sewn for myself in years, and I have never been whatever size it is that I am now. I had not measured myself either (all cardinal rules, but I knew I had to break some of those anyway). My experience is that if I select a pattern or garment to "fit" my current size, it will be WAY to huge in so many ways, as my "frame" is not designed for the amount of weight it is carrying. So I have to start with something smaller and add where needed
Before cutting, I measured myself, and I measured the pattern. It appeared to be WAY too small. So I added sufficient inches that it would at least go around me. I added a whole chunk from the shoulder seam to the hem, just at the end of the dart. I also cut the sleeve hole deeper (down the side seam further), and added to the circumference of the sleeve.
We had only our sergers in class, but there was a sewing machine provided where we could run a quick basting stitch to try things on. I spent more time in the restroom trying mine on than anyone else did, but without it I would have had an "unwearable garment".
First step: In the pattern directions, they had you making the darts way later in the process, which I think is ridiculous! Much better to make them when the pieces are still absolutely flat and not attached to anything else! (That is, unless you are worried about dart placement with your figure. I laid it beside myself and they were fine where I'd put them.) So first, make the darts.
In class I learned a new "flat sewing" trick. Stitch one shoulder, then apply the band around the neck before stitching the other shoulder. As the fabric is very light weight, this technique worked really well! So far, so good.
Then I learned another "flat sewing" trick. It is a "modified" sleeve insertion method. When working with certain fabrics and patterns, I have often inserted a sleeve with no pinning, before sewing the side seams. Vogue sleeves have long "caps" (the part at the top) though, so this one required pining all the way around. The trick is to sew from one set of the ^'s to the other set of the ^'s. (Or stated another way, sew from about 1-1/2 inch from the side seams on both sides of the sleeve; do not attach the last 1-1/2 inch on each side.) This allows you flexibility in adjusting the side width, and according to the lady who told us about it, your sleeves will not rip out in the armpit area. (I have personally never had a sleeve rip there, but she is even more heavy-set than I am, and she has had this issue).
It was a very good thing that I used this modified sleeve insertion technique, as the shoulders were WAY too wide, and the garment was WAY too big around. I took out an extra full seam width (5/8") twice in the shoulder width before getting it close to my size. This was my fault, because I added all that width and did not adjust for it in the shoulder seam placement. I have narrow shoulders, and it is always an issue.
Then I basted down the side seams--WAY TOO HUGE! I serged a one-inch+ larger seam down each side, and it is still wide, but I am leaving it that way for this garment.
[Part of the dfificulty in sizing this particular pattern is that it is designed for knits, and I added enough fabric for non-knits because I didn't want to end up with too little. I may have gotten closer to the mark if I had been sewing for myself any time in the last ten years, but I haven't. And I would rather have too much than too little. However, there comes a point when "too big" is not adaptable to a much smaller size--nothing is in the right place after you take very large seams too many times in the same garment.]
I then removed all the excess I had allowed for circumference prior to sewing the seam in the sleeve. I stitched the seam and inserted the remaining portion of the sleeve.
Then using a cover stitch, hem the sleeves and the bottom.
On my sewing machine at home, I stitched the seam allowance from the neck binding down to the bodice.
Black on black does not show up well, so there is no point in including photos of details.
It was not the most satisfactory project I have ever done, but it's an ok tee shirt, and definitely large enough for "puffy days". With the right fabric, cut to close to the right size, it could be a really nice tee shirt. It is unusual to find a darted one, and that is also a design element which can be very nice.
Wow! This seems like it was a lot of work but worth it for all the things you learned. I like it :)
ReplyDeleteIt was a LOT of work, and in retrospect, I should barely have enlarged the pattern at all, because it's still quite a bit too large.
ReplyDelete