Monday, November 11, 2024

Trick for keeping top stitching straight and evenly placed

For years I have wanted a better method for sewing straight stitches which show on the outside of clothing -- especially when I want a double row of stitches.

I did not think this up on my own -- in fact I am rather late coming to it.  I saw something similar online and I tried it.  I'm pretty happy with the results, especially as this was thick fuzzy-backed fleecy sweatpants.  They came much too long so I hemmed them.  

I had a small retangular, rather thick plastic quilting shape.  It needed to be small because I wanted to take the arm off so I could sew "around" the bottom of the pants legs easily.

First I marked and cut the pants legs to the length I wanted (plus a deep hem).  Then I serged around the bottom edge of each leg so it would not be messy.  (It was way too thick to "turn under" again to hem the pants.)

Next I sewed a basting stitch all around on the edge that I had turned under to hold it in place for hemming.  Also, so I could try the pants on to make certain I got the length correct.  Normally, for sweat pants I would not go to this many steps, but I wanted to test my new method.  It was a good thing I did, as well, because they were still 1/2 inch too long.  So I removed the basting stitch, turned them up further, pinned and basted them again. 

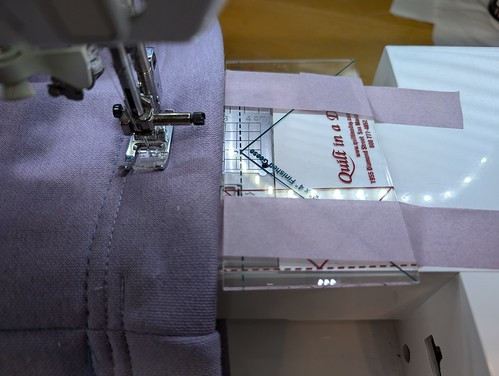
After estimating where I would need to place the pant leg in order to get a "deep" top-stitched hem, I taped the plastic guide to the machine using "delicate" 3M tape (like blue tape, only much less sticky and doesn't leave a residue.  The tape used to be blue but is now lavendar.)

(Sorry about the reflection from the LED light strip I attached across the back of the machine -- it really helps me see much better.)


I butted the hem of the pants up against the plastic guide, and stitched.

In this photo you can see (L-R), the blue thread basting stitches, the first row of heming stitches, and I am just completing the second row of heming stitches.

After finishing the two rows of hemming stitches, I removed the basting stitch row.  (I placed the pant leg on the machine in order to get a good photo of the hemming stitches in the LED lights I attached across the back of my machine.)  I am pretty pleased with the rows of stitching now.


Friday, April 3, 2020

Mask - 2 piece - virus (COVID-19, etc.)


These Instructions are an attempt to show very inexperienced persons how to make this mask.  There are MANY different versions of masks one can make.  I will be posting more versions very soon.

Materials requirements:

Cotton fabric, washed in very hot water and dried in dryer on hot
2 pieces - each 8” x 8-½” - EACH CUT FROM A DIFFERENT FABRIC
(important for wearers to know which side is already contaminated)
Elastic (soft if you can get it) - 
¼” or ⅜” wide, (two 7 inch pieces)
Scissors
Thread
Pins
Sewing machine
Steam Iron preferred, not mandatory

Directions: 

(I use a “3” stitch size throughout.  “2.5” is ok, but harder to remove if needed.

Version - Pleated with no pocket, no pellon - may be worn alone or over a “real” mask

  1. Choose two contrasting fabrics. 
  2. Prewash the fabric on Hot if you can (important but not essential).  Dry on Hot.
  3. From each piece of fabric, cut ONE 8” x 8-½” square.


  1. Place the two pieces of fabric with the right “nice” sides inside. Using two pins, pin the stacked layers together.
  1. The 8 ½ inch edges are the “top” and “bottom” of the mask.

  1. Fold back one of the 8.0 inch sides of the top piece of fabric a few inches. 
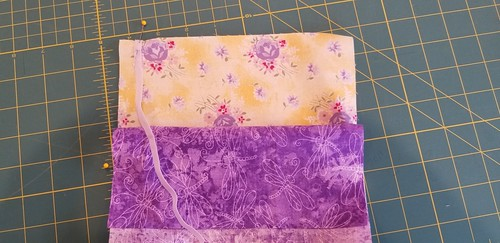
  1. On the bottom piece of fabric, along the shorter 8.0 inch side, pin each end of the elastic as shown in photo below (place the elastic flush with the raw edge of the fabric.)


REPEAT on the other side with the second piece of elastic for the second ear loop.

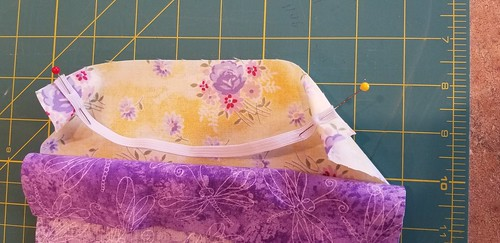
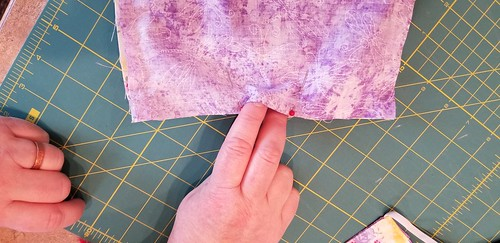
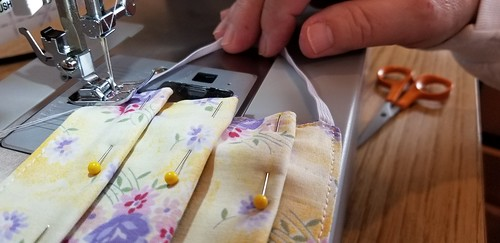
  1. Pin along ALL the seams, sew ½”  seam almost all the way around, leaving a ~3.0 inch opening.  The red pin in the center is where you will leave an opening so you can turn the fabric right side out after sewing the seams. Be very careful to keep the rest of the elastic away from where you will sew the seam (push or pin it further into the interior.

    The first photo shows how the elastic fits inside the seam.  

The second shows it fully pinned with the red pins (at the bottom) marking the opening you will leave.  

The third photo shows fingers in the opening you must leave.

[If you are experienced, you won’t need to pin it quite as much, but the “wrinkle” on the sides where you will sew the elastic works better if you pin a bit more than usual.  It also helps keep the elastic “ ear loop” from getting under the needle.]

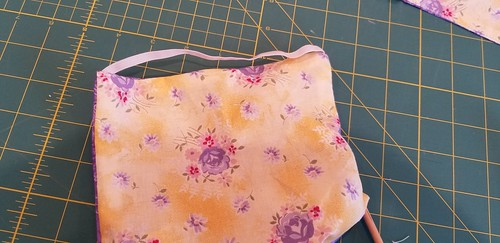
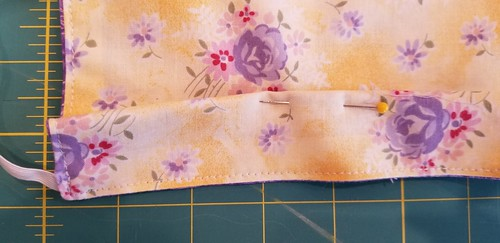
  1. After stitching, snip a tiny triangle off each corner before turning, leaving at least ¼ inch wide area of fabric in the corner (i.e. don’t cut too close to the seamed corner.)  This photo shows the sewn seam and the snipped corners prior to turning to the right side.
  1. Trim any loose threads, including any from the open area of your seam.

  1. Insert your hand inside the mask and pull the fabrics through the 3.0 inch opening.
  1. Using a pencil or similar pointy thing, poke the corners out from the inside nice and sharp as you can.

Now you are looking at the nice sides of both fabrics, and some elastic ear loops.

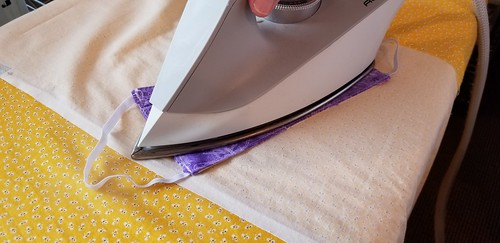
  1. Iron the mask super flat if you have an iron.  (This photo of the ironed mask shows the way the elastic should appear at the corners of the mask.  In the center at the top of the mask you can see where you will flatten the area that you left open to turn the mask to the right side to prepare it for stitching.)

  1. Keeping seams pulled “out” (not tucked in) press down the mask, making sure those corners are nicely pushed out and the “open” area is nicely matched to the rest.
  2. Top stitch about ⅛” from the outside all the way around the mask, overlapping first stitches about half inch at the end. You are welcome to add extra stitches over the ends of the elastic, as they will be under tension when mask is in use.  (You may do this by reverse stitching about three stitches over each place the elastic comes through the seam.)
  1. The slightly longer side is the top part of the mask.
    1. Make 3 pleats, approximately 1” apart and ~½” deep, all going the SAME direction.  Pin as you go; also pin in the center. It is easy to pinch the pleats up with your fingers, then mash them down to make the pleat. Then pin in place. The mask should now be about 4 inches tall and about 7.5 inches wide.
      1. Making the pleats (please see ii. for way to make a pleat)
        1. Pin as you make the folds


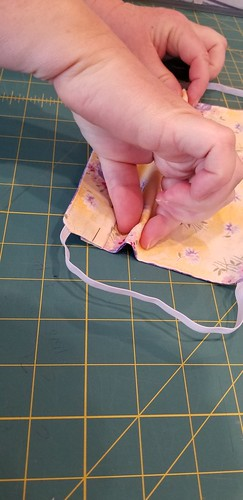
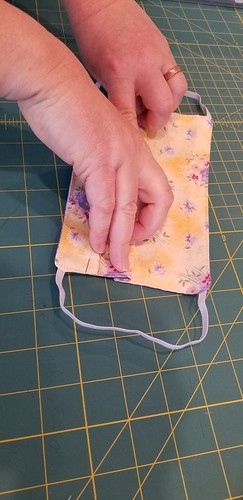
      1. Making pleats  (this shows the method on the 2nd pleat)


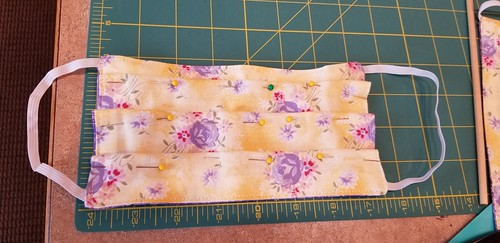
      1. Fully pinned pleats, ready to sew.  At this point, the mask is about 7-½” wide by about 4” tall.
    1. Iron firmly on each side; try not to melt your pin heads; you can just press between the area with the plastic pin heads.

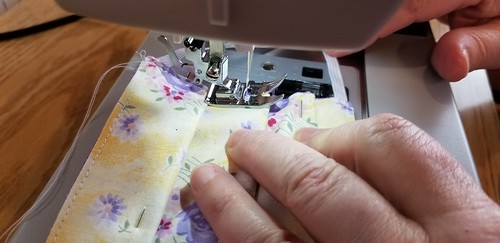
  1. You are about to stitch down your pleats. At the sewing machine, be SURE to have the folded pleats pointing at YOU. About ¼ inch in the from each edge, stitch down each side once to hold pleats in place.  (mandatory step)

    1. First one side (two views)  Sewing DOWNWARDS over the pleats!

    1. Then the other side (again stitching DOWNWARDS over the pleats)

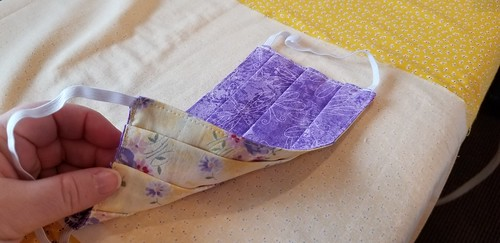
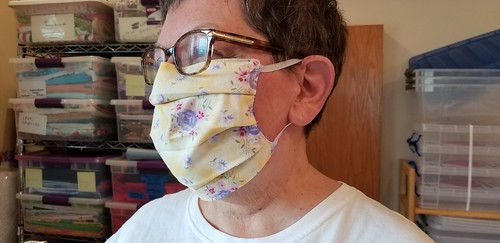
  1. Finished mask


Congratulations!  You should now be able to help both yourselves and others by making this mask.

Monday, April 8, 2019

Coated Nylon bags - Waterproof fabric


These bags are very easy to make.

First determine the size bag you want (width and depth).  For example, 6" x 9".  Then multiply the depth by 2 (i.e., 6" x 18").

Add 1-1/4" to each of these dimensions.  (i.e., 6-1/4" x 19-1/4").

For this size example, cut one piece of fabric 6-1/4" wide x 19-1/4".

Fold the strip of fabric in half (6-1/4" x aprx. 9.625") with the outside of the fabric towards in inner side.

Next step:  sew in your zipper with the zipper pull facing the outside of the fabric.  (Make a very short seam (about 1/4" long) on each end.  Sew the zipper into the space between the two short seams.  If your zipper is longer than the bag, that is okay -- possibly even preferable.

OPEN the zipper enough to be able to put your hand through to the inside (the outer fabric).  Then sew down each side.

When sewn, pull the bag out through the zipper so it is right side out. 

[Sorry, maybe next time I will take photos through the whole process and write it up properly.]
.
End result:

Monday, April 1, 2019

Geometrics make a cute top!

After much searching over a long period, I decided to make my own top.  I was fed up with wearing solid colors (mostly white and black) with very little variation.

Our local Benjamin Franklin store had a bolt-end of this fabric (I think it was just over a yard, but may have been less).

I had a top I quite liked, except I wanted it a couple inches longer.  So I made a paper pattern from the store-bought top (tricky to get right, but I did).  Laid the big print out to center a big "stripe" down the center front and the center back.

After cutting, I serged the shoulder seams and side seams.  Checked the fit -- it was good.  Pressed the seams.

Then I cut some fairly-diagonal strips to make a binding for the neck and armholes.  Stitched the strips and pressed the seams.  Then folded the strip and pinned it together.

NOTE:  In my opinion, it is ALWAYS tricky to stretch just the right amount when sewing binding to curves!  If you stretch too hard, you get crinkles around the curve in the garment.  If you do not stretch enough in the deeply curved areas, the binding will flop out like this:


Please note it is doing the flopping in the center front AND in the back as well where the curve was much more gentle.  (The sleeves came out well because you sewed the binding down, then turned the whole thing inside and stitched.)

I had zig-zagged around those curves, then serged the binding onto the top, then placed a row of stitching on the top to keep the binding flat.  (Until I stitched the top I could not be certain it was not acceptable).  Had I attempted to remove all those stitches I was certain the top would have become so distorted that it may never be okay.  So I came up with a "cheat"--I wasn't certain how it would work, but it did okay.  Now I just have to see how it wears over time.

My solution was to go into the front neck below the "cross-type" design.  I put in a thread on the back side, pulled it up through the binding, and put a row of stitches around the part of the neck that needed to be tightened.  I did the same thing on the back neck.  I sewed through to the inside of the neck fabric but no stitching goes through the outside layer.  With each stitch I pulled a little bit, trying to gauge how much I needed to reduce it by.


If you look closely on the back of the neck you can see the stitching where I pulled it just a little.  On the back I should have pulled it even a bit more, but it is okay.  The front came out acceptably.  I wish I had done it the right amount in the beginning, but this is an okay option.  I think you can hardly see the "puckering" around the front neck.  I wonder how it will wash???

[Better luck next time.]

Saturday, March 30, 2019

Sweet Pea wants a warm fuzzy "bankie"

My granddaughter loves sleeping under the lovely, soft, "throws" made from faux sheepskin on one side and deep fleece on the other.  They make over-size ones (i.e., a bit longer and wider), but I have been unable to find a twin size one.  She has outgrown the length of the throw.

After searching high and low for fabrics exactly like our great Costco throws, I gave up and purchased some very soft fleece for one side and some 'short, curly, furry fleece' for the other.

I bought 2-1/2 yards of each fabric.

I serged across the messy ends of both fabrics.  Then I washed them in the washer and dried each in the dryer just in case there might be any shrinkage.

I placed the outsides together and pinned them in place.  When pinning, I pulled the patterned fleece a tiny bit tighter than the curly one in order to keep the patterned fabric from showing on the curly side.  (I did not care that the curly one would show on the patterned side.  Then I serged around the edges, leaving about 12 inches open to turn it.

When I had turned them I was not surprised to see that the curly-type fabric had stretched out enough so as to make it wider on one end than the other fabric.  I turned it back out and on the side where it was too wide, I re-serged about half way down the side of the blanket--thus making another nice straight line with no excess.  (No need to remove previous serging.)

I turned the blanket again, matched up the opening and because of the curly fleece, I decided to blind-stitch the opening by hand.

I then laid the blanket flat and pinned all the way around the outside edge.  I then stitched a row about 1-1/2 inches from the edge all the way around (to keep it from rolling and balling up).

I was very tempted to put some more quilting-type stitches in the center to hold it all in place (it's pretty heavy and very slippery).  I decided NOT to do this because my granddaughter loves things that are all soft and fluffy--stitching might make it not quite so soft in that area.

Granddaughter had gone on vacation, leaving her sweet little lama with it's head on the pillow and under the throw.  So I placed the lama as she had, and put the blanket on the bed.

I intentionally did not make it all smooth and flat.


The back side looks almost like paw prints but is really little flowers.


Bottom line is:  she LOVES it!  (And I'm very glad, because that fabric cost a lot more than I thought it should._

Monday, January 7, 2019

Covering more pillows

I may have to be on break for a while again, so I'm posting this little chore for the day.

My daughter had purchased four pillows at IKEA, but the color was all wrong.

She found some material which pulled together her butter-yellow leather couch and chairs with her gray heathery couches.  It was a quick job; I did not make them removable for washing as by that time my daughter will likely want to replace them.  (IKEA fillings aren't going to last that long, and she likes to change things around.)
These will go on the couches with the "animal" pillows in a previous post.

It was an easy chore.  The most time consuming was getting the pieces cut out with the design centered and matched.

The fabric is quite nice (Waverly) and slightly loosely woven (which actually makes the job of turning corners easier).

  1. After cutting the pieces, I serged all the way around each piece as it tended to ravel.
  2. Then I put the two outsides together and sewed one long seam around the long sides and one end.  Stitched that seam twice.
  3. Trimmed the corners I had sewn.  
  4. Turned the case inside out.
  5. Pushed out the two corners until they were square.
  6. Inserted the pillow.
  7. Folded the seam allowance in on the open end and pinned it in place.
  8. Hand stitched across the open end, using a blind stitch.
  9. Repeat for the other three pillows.
  10. Done!
The photo only shows two of them.  All four are identical.


Should the need arise, I could pull out the blind stitches and remove the pillow. 

Wednesday, January 2, 2019

Making a shopping bag for France - on New Year's Day!

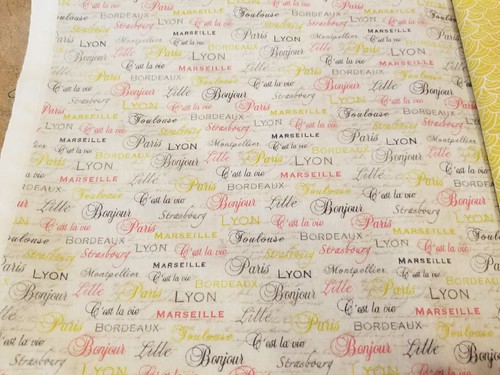
A dear friend of mine will be living in France for five months this summer.  When my daughter saw this cute, very topical fabric, she wanted to make a bag for her to take along.  So she bought this fabric, but there was never any time...


She also chose a nice solid grey for contrast, but we ended up not using it.  (And because, in the end, I opted to make a bag the size of a normal paper grocery store bag, I did not put in a zipper pocked.)

I had a pattern for a shopping bag to make from mesh (examples I have made are earlier in this blog).  I did not have a pattern which included a lined bag made of fabric.  I thought it through and fortunately it worked!  I used the softer version of webbing for the handles.  I also used two layers of good white cotton inside the base in hopes of giving it strength.
In addition, I wanted the whole thing to be washing machine friendly.

The pattern was one-way in each case, so I had to keep this in mind.  I sewed the two exterior pieces together, then the two pieces for the lining--making certain to leave a good 6-7 inches OPEN in that seam.  (Each piece was 20" long before sewing seams.  I simply trimmed about an inch down the side to get rid of the selvedge, and slit down the fold side.)  Then I sewed the strengthening white cotton onto the EXTERIOR fabric pieces (could not put it on the lining--that seam had to stay open.  Then I zig-zagged all around the edge of the white fabric to hold it firmly in place.
In order to make the lining, I sewed webbing straps on the outside fabric UP TO about 3 inches from the top of the bag, putting the overlap of the webbing in the center of the bottom of the bag.  (I always re-enforce the inch or so where the webbing overlaps.  For the webbing I used Metrozene thread and a size 14 needle.)

I then sewed the lining to the top of the bag, then sewed down each side to create the "sack", making certain not to sew through the straps at any point.   I then turned the whole thing (with its straps) to the outside (and it worked--yay!) and blind stitched the opening I had left in the lining.  I slipped the bag over the machine arm and zig-zagged a couple of inches of center bottom seam through all layers--to hold it all in place.

I then zig-zagged around the entire top of the bag before sewing the webbing straps the rest of the way to the top, reinforcing the webbing along the top edge of the bag in each case.

Then I sewed across the two bottom sides to create the "box".  The strengthening fabric I put into the bottom created quite a lump, so I cut across the ends, serged it, then zig-zagged the remainder to the bottom of the bag.  In order to make it easy to use and fold, I simply pressed a fold down all four sides.

If this bag had been for me, the pattern would have gone on the outside, but we felt the recipient would prefer it the other way. 

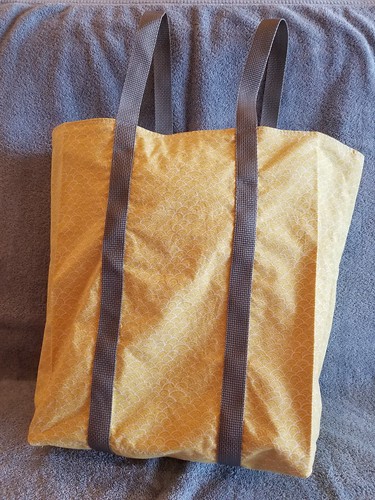
In this photo, the finished bag has a pillow in it and the webbing looks very ruckled.  It actually isn't ruckled:


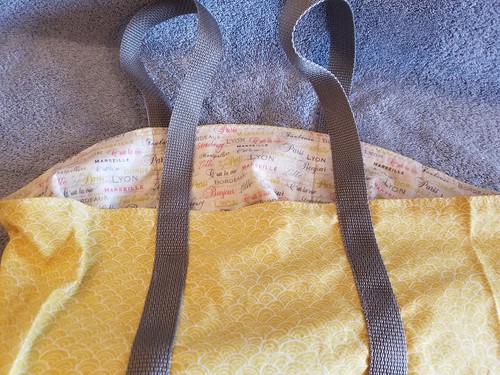
Showing the inside and the outside of the top of the bag:


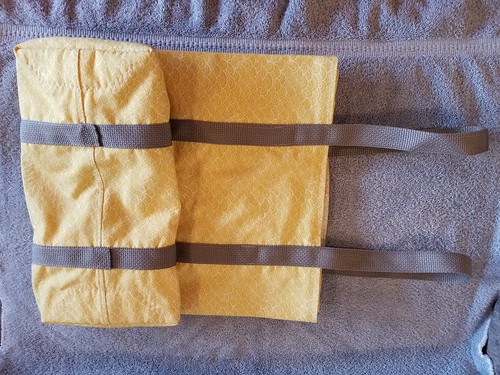
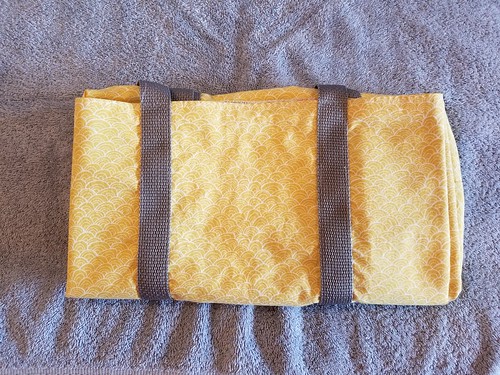
In this first fold you can see where I zig-zagged the sides down to the bottom and in the middle where I was stabilizing the center seam:


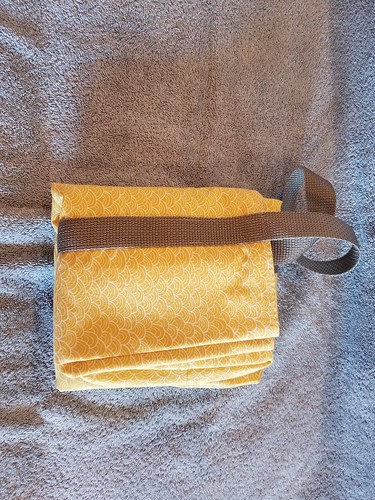
Next fold:


If desired it can also be folded one more time:


Due to the strength of the (quilting) fabric and the webbing straps, this is quite a strong bag.  It is probable that the strengthening fabric inside was not needed, but it has made it even stronger.  I am certain one can carry several bottles of wine and a loaf of bread home from the market in France!

----------

Postscript:

  • Should one think it might be okay to NOT have a seam down EACH SIDE of the bag; first of all, the one-way pattern prohibited that.  
  • But the MOST IMPORTANT reason, is that one MUST have a seam down both sides in order to be able to create a bag which can be turned inside out!


Making a "test" set of chair coverings from Pillowcases

For a long time I have needed to make something to cover up my good chair on a daily basis.  When I finally got it cleaned, it nearly ruined the fabric so this week (on the 1st day of January) I decided it was time to use some old pillow cases and make a trial set of coverings.

I will probably use them for a long time while I check their functionality, run them through the washing, and ponder what fabric I might consider making "real ones" from.  This process make take years!

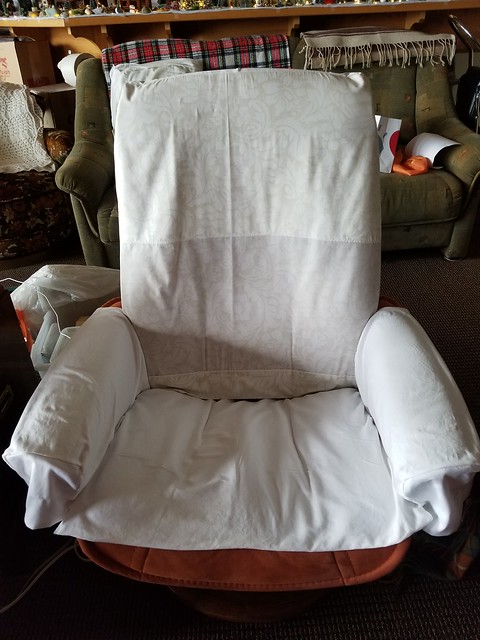
I cut open the old pillow cases and sort of laid them on the bit of the chair I was working on, cut them large, sewed, and tested, re-sewed until they were like I wanted.  Then I serged the seams and hemmed.  There are four finished pieces:  chair back, each arm, and the seat.

Also, on the one for the back of the chair, I put two layers of cotton (sheet scraps from quilting)  underneath the pillow case for where oils tend to get on the back of one's head and ruin the upholstery.

You can see the extra layers on the chair back:


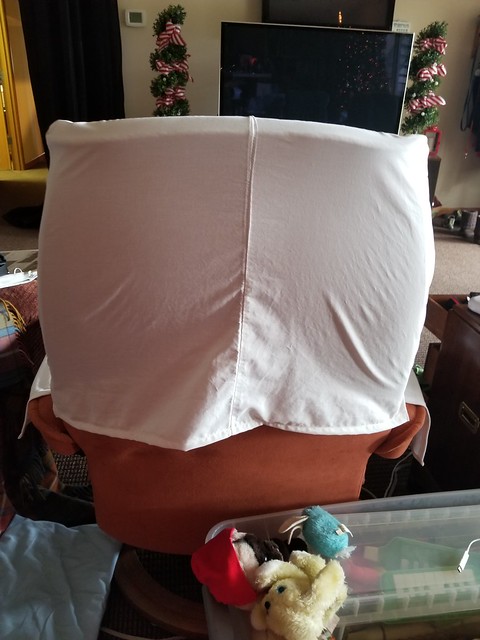
View from the behind the chair (this side is a much shorter piece as otherwise it simply dangles in the air.  Some refinement could occur in a finished design (of all parts); however, it cannot be a "snug fit" at the bottom as it would not be possible to slide it down over the top of the chair.

Monday, December 31, 2018

Healing my soul with Jamies

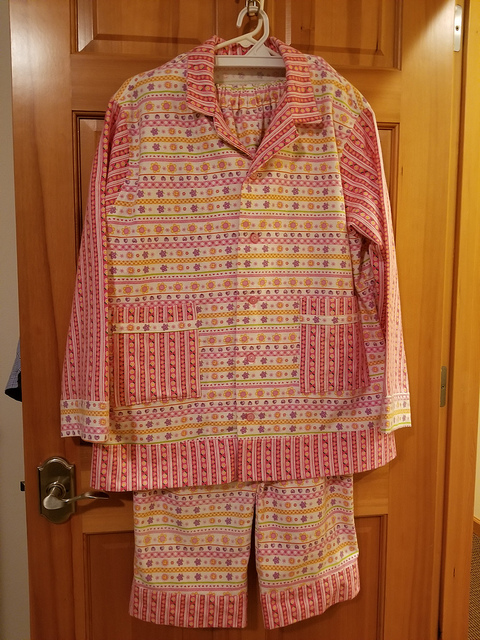
What do you do when you just NEED to sew and you haven't done it in a LONG time really, so you need to make something that really won't matter if you screw it up.  And there are no longer small pink flannel people in the house.

You look in your "stash" and find two smaller pieces of crazy pink prints long ago intended for small pink people which you think MIGHT make one pair of adult jamies--maybe. Then you decide how to coordinate the two fabrics, lay it all out, and you can JUST get the pieces with almost no leftover bits ('cause you're good at that). So you think of how to combine them, cut, sew, and guess what, you have new jamies!

I told my 12-year old granddaughter I was making "the world's ugliest jamies".

Little Miss Artist took a look and said, "they are NOT ugly, they really aren't. They are actually pretty good for combining two random pieces of fabric; they are just PINK!"

(Don't you just love the honesty of children?)

And I said, "And you know what, I DON'T WEAR PINK!" Much laughter ensued.

I haven't worn pink since I had my colors done 30+ years ago, but guess what--I'll be wearing these--they are cozy! (And crazy suits me just fine...)

FYI: It probably took 3-4 times as long to design and make "coordinated jamies" than if it had been one piece of fabric with no matching required. But it was good--required total mental absorption. (Not to mention 'reverse engineering' a store bought pair and adapting a pattern that was way too bulky...)

(I know, some of you will need to wear your sunglasses while you choke!  Never in my wildest dreams would I have chosen these fabrics to coordinate, but it worked--it really did.)

Thursday, December 27, 2018

Couch pillows from tea towels

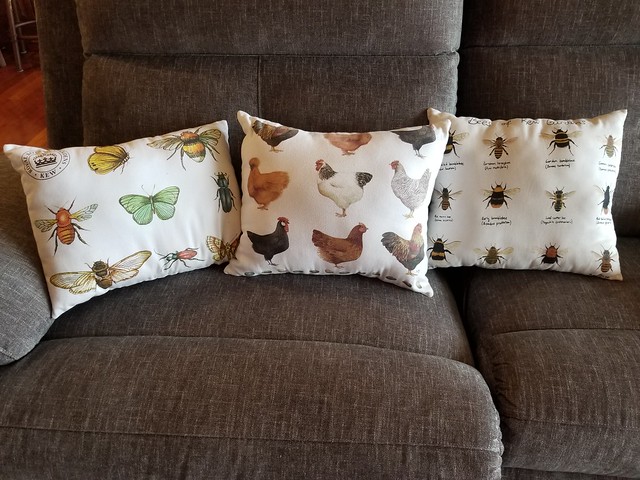
Several months ago, my daughter wanted me to make her some pillows from some very adorable animal tea towels.  Extremely simple:  determine where the animal placement should be, sew a seam across the end pieces (even though they do not end up being at an edge due to the pattern) LEAVING an opening to pull it through, sew down both sides, pull the outside through, stuff, and stitch the opening closed!  Done.

For the record:

Tuesday, July 18, 2017

What it looks like when I have to move my "stash"...

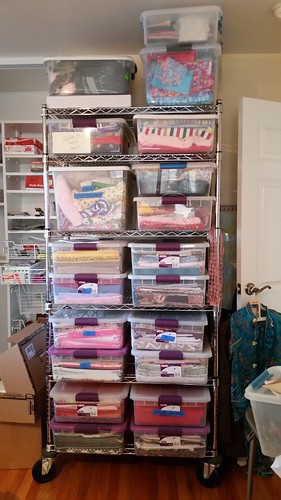
In March of 2017, we learned we had 90 days before trucks came to move us far away to our new home.  I was NOT going to let anyone else pack any of my sewing supplies, machines, or my "stash".

(Actually most of my stash was already in plastic boxes--I stored them that way, on a rack, on shelves, and stacking the big ones on the floor.)

First I took my original boxes and packed my good sewing machine and my serger.  Then I adapted a box for my old serger and cut out odd styrofoam pieces to stuff around it.  (Around each machine, I packed the parts and supplies that would fit--i.e., machine parts, bobbin collections, tools, etc.)

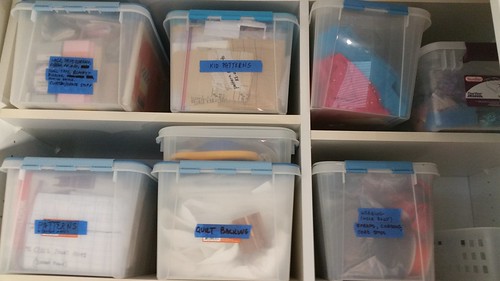
In other boxes I packed all of my sewing and serger machine feet, all of my thread-holder-boxes, and all the small boxes of things like zippers, elastics, velcro, buttons, ribbons, patterns, etc.  These boxes all had labels indicating the major categories in that box.

Pattern boxes, quilt backing, etc.:  (You can see the "Craft Room" blue tape labels on these boxes--every box was labelled.)


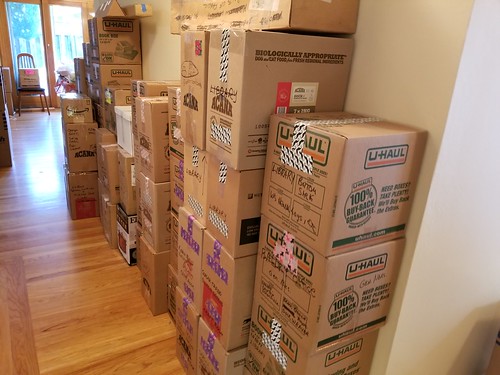
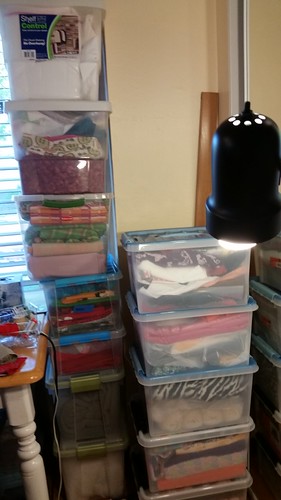
The smaller boxes ended up in this stack:  (The purple patterned duct tape was the designation for things to be taken to the Craft Room upon arrival.  You can see a lot of writing on the boxes indicating contents.)


The big (permanent) rack for fabrics (mostly quilting fabrics):  (These large plastic crates were moved "as is", in stacks on the moving van.)


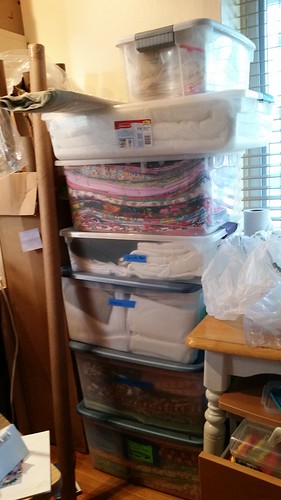
Some of the other crates of fabric -- flannels, and many other kinds (anything large enough was also moved "as is").


I have no photos of the iron, steam machine, sewing machine, and two sergers in their boxes.

(If you wonder why I am moving my old serger as well as my newer one, it's easy.  It's a good one, but the kind that will make you lose your religion changing threads!  I keep it threaded in white, and use my other one for all other colors and the variety of other things for which I have feet.)

Upon arrival, all of the boxes were taken to the Craft Room and the boxes went straight onto the big rack.  Other fabric boxes were piled all over the craft table, underneath it, etc., waiting for final destination.

Eventually I spent a couple of hours finding boxes whose contents would enable me to at least be able to stitch up something needed (like a temporary curtain, mending things, sewing on a button, etc.).  The labels were so well done I was able to find critical threads for all machines, machine feet, and my "tools".

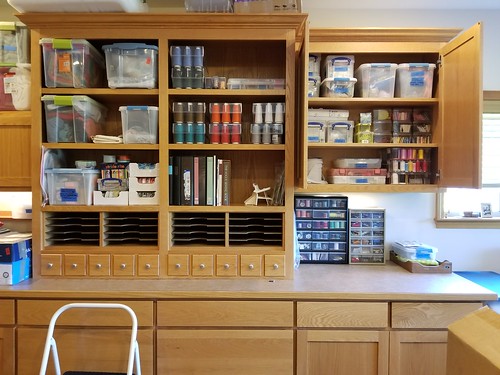
In a couple of hours on another day, I began organizing my portion of the (shared) Craft Room:  (By now, it was July 18, 2017--but I was  relatively "functional"!  This space felt like heaven!)


Eventually a home was found for the remaining boxes.  Yay!

Now the chore is to sew it all up, someday (when we have unpacked more stuff).

[This post actually written Jan. 2, 2019 -- there hasn't been any time!]


Thursday, May 19, 2016

YooHoo! Back again already -- Cell Phone carrier for my backpack

I searched high and low for a cell phone carrier that would attach to the front of my backpack for easy access.  The only thing I found (on Amazon) was a very heavy-duty bulky one that looks more like hunting and military use.  When it arrived, it was heavy, stiff, and I was not especially enamored with it's method of attachment.  So I decided to design my own.

I had some extremely lightweight (30 denier) silicone-coated nylon-type fabric.  I also had the heavier mesh like I use to make the mesh bags (pictured elsewhere in the blog, click on label "bag").

I hoped the carrier would be water repellent, lightweight, comfortable, easy to access, and easy to attach to my backpack.  I studied the heavy one and incorporated some of it's features, adapting it to my own desires.

I apologize, I did not take photos of the process (next time!).

I used the heavy one for a pattern and made it just a tad bigger because I wanted it to slide in and out very easily.

Both the inside and outside are made from the same fabric.  I put a strip of the mesh inside to give it a little strength and shape while retaining the water repellency.  I made the mesh smaller than the actual finished size of the carrier as I did not want the amount of bulk it would have created in any seams.

I had the D-ring on hand.  The 5/8-inch webbing came from Amazon, as did the buckle (and now I have enough buckles to make stuff for the rest of my days--still cheaper than getting what I needed elsewhere!)

  1. The case is like a "sleeve" (pillowcase) with one end closed.
    1. One long strip of fabric, folded in half and sewn down each side.  
  2. Turn it right side out and insert the mesh.  
    1. Put a basting thread on the closed end to hold the webbing in place.  
      1. The mesh is about 1/2-inch narrower than the finished size, so it was loose.
    2. Putting holes in the fabric will reduce water-repellency so use of pins was also very minimal.
    3. The fabric is very slippery.
  3. First determine where the buckle should be.  
    1. Hold it in place with webbing, adding enough length to allow for tightening.
      1. Before stitching all webbing to the fabric seal the end by holding it over a flame briefly to melt/mold it together.
    2. Stitch a fold on the open end of the webbing that stays loose after going through the buckle.  
      1. The open ended webbing is to make it possible to tighten the webbing once the cell phone is in place.
      2. The fold on the end of the webbing is to keep the webbing from sliding out once inserted.
    3. Feed the webbing through the buckle and back again, making certain to put the folded end of the adjustment strap end on the outside so you can pull it.
    4. Sew the buckle in place leaving the final length of the webbing to be determined later.  
  4. With the buckle attached, determine how much webbing is necessary to attach the D-ring on the TOP of the carrier.
    1. Seal the lose end.
    2. Use the newly sealed end to attach the D-ring, looping the webbing back over itself after stitching as close to the D-ring as possible.
    3. Stitch the webbing down--making a rectangle of stitches near the end for strength
    4. Determine the place for final finished end and trim the mesh.  
      1. Close the open end of the "sleeve" by folding the unfinished ends to the inside.
      2. Stitch close to the end, across the open end.
    5. Mark where the other end of the buckle goes, insert webbing, sew webbing down firmly.  
    6. With the D-ring in place, decide where to put the small "sleeve" for sliding the waist strap through.  
      1. This one begins about 1 inch below the D-ring.
    7. Cut the small "sleeve" and mesh for the waist strap.  
      1. This one is a finished size of about 3-1/2 inches wide (narrower than the carrier) and around 4 inches long (generous to allow for easy strap insertion).
      2. It is made the same as the rest--inside and outside are the fabric with a piece of mesh inside for strength.  
        1. Stitched and turned right side out, then mesh inserted.
        2. In this case, the mesh goes to the seams, but NOT into the seams.
        3. Fold the open end, trim mesh to fit (a little narrower so as not to stitch through it.
        4. Stitch across open end.
        5. Attach it to the main section, placing it about an inch below the D-ring with open sides to each side of the carrier.
        6. Put a slide gap in from top to bottom (instead of laying it down very flat) to allow a bit of space for inserting the backpack strap's buckle.
        7. Stitch across the TOP and BOTTOM, making certain to leave the SIDES open to allow insertion of the backpack waist strap.
    8. With the carrier wrong-side out, sew a VERY narrow seam down the sides to form the holder.  
    9. Turn right side out. 
    10. Fold the loose fabric (beyond the mesh) of the "lid" inwards and stitch down around the three open sides (so it doesn't flop around).
    11. It's done!

    I had planned to sew across the end of each side on the inside of the finished carrier to create a "box" effect, but there was not enough space to do so.  As it turned out, it wasn't necessary.

    I am rather relatively happy with my first attempt!

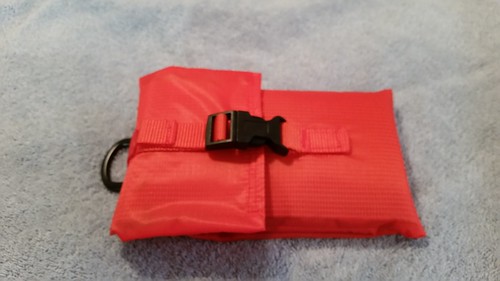
    Finished Cell Phone holder:
    (In these photos, I had not yet done step No. 11 above.)


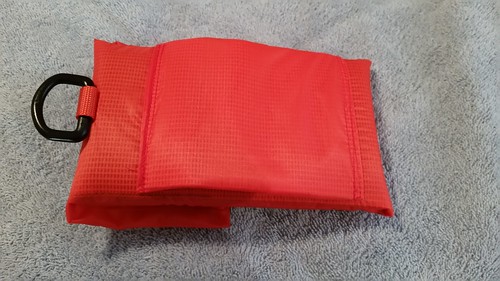
    Back side, showing the "sleeve" to slide the backpack waist strap through--see the slight gap:


    The idea of adding the D-ring came from the purchased one.  It gives an addition way of attaching the carrier to the backpack, etc.

    Here I slipped a strip of fabric through the "sleeve" to demonstrate how it works:


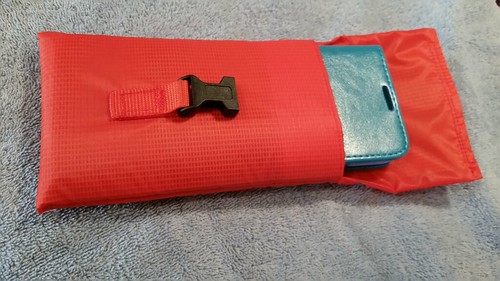
    Cell phone cover slipped inside:


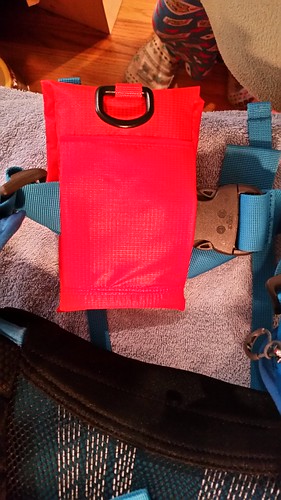
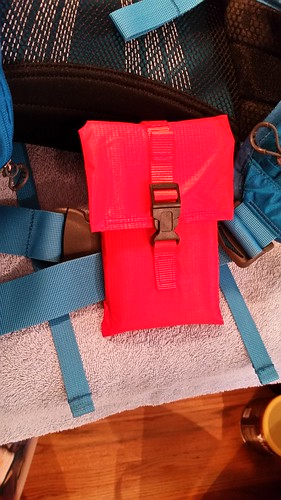
    Backside view when carrier is slipped onto the backpack waist strap:


    Front view -- waist strap buckled with holder in place:


    I will use it for a while and see what I might wish to add or change before making a second one.  Also, it was my intent to make it just a little bit large for my current phone because they keep making the phones larger.  This carrier came out fitting easily and perfectly--it really isn't quite as big as I intended for the future.