I had some extremely lightweight (30 denier) silicone-coated nylon-type fabric. I also had the heavier mesh like I use to make the mesh bags (pictured elsewhere in the blog, click on label "bag").
I hoped the carrier would be water repellent, lightweight, comfortable, easy to access, and easy to attach to my backpack. I studied the heavy one and incorporated some of it's features, adapting it to my own desires.
I apologize, I did not take photos of the process (next time!).
I used the heavy one for a pattern and made it just a tad bigger because I wanted it to slide in and out very easily.
Both the inside and outside are made from the same fabric. I put a strip of the mesh inside to give it a little strength and shape while retaining the water repellency. I made the mesh smaller than the actual finished size of the carrier as I did not want the amount of bulk it would have created in any seams.
I had the D-ring on hand. The 5/8-inch webbing came from Amazon, as did the buckle (and now I have enough buckles to make stuff for the rest of my days--still cheaper than getting what I needed elsewhere!)
- The case is like a "sleeve" (pillowcase) with one end closed.
- One long strip of fabric, folded in half and sewn down each side.
- Turn it right side out and insert the mesh.
- Put a basting thread on the closed end to hold the webbing in place.
- The mesh is about 1/2-inch narrower than the finished size, so it was loose.
- Putting holes in the fabric will reduce water-repellency so use of pins was also very minimal.
- The fabric is very slippery.
- First determine where the buckle should be.
- Hold it in place with webbing, adding enough length to allow for tightening.
- Before stitching all webbing to the fabric seal the end by holding it over a flame briefly to melt/mold it together.
- Stitch a fold on the open end of the webbing that stays loose after going through the buckle.
- The open ended webbing is to make it possible to tighten the webbing once the cell phone is in place.
- The fold on the end of the webbing is to keep the webbing from sliding out once inserted.
- Feed the webbing through the buckle and back again, making certain to put the folded end of the adjustment strap end on the outside so you can pull it.
- Sew the buckle in place leaving the final length of the webbing to be determined later.
- With the buckle attached, determine how much webbing is necessary to attach the D-ring on the TOP of the carrier.
- Seal the lose end.
- Use the newly sealed end to attach the D-ring, looping the webbing back over itself after stitching as close to the D-ring as possible.
- Stitch the webbing down--making a rectangle of stitches near the end for strength
- Determine the place for final finished end and trim the mesh.
- Close the open end of the "sleeve" by folding the unfinished ends to the inside.
- Stitch close to the end, across the open end.
- Mark where the other end of the buckle goes, insert webbing, sew webbing down firmly.
- With the D-ring in place, decide where to put the small "sleeve" for sliding the waist strap through.
- This one begins about 1 inch below the D-ring.
- Cut the small "sleeve" and mesh for the waist strap.
- This one is a finished size of about 3-1/2 inches wide (narrower than the carrier) and around 4 inches long (generous to allow for easy strap insertion).
- It is made the same as the rest--inside and outside are the fabric with a piece of mesh inside for strength.
- Stitched and turned right side out, then mesh inserted.
- In this case, the mesh goes to the seams, but NOT into the seams.
- Fold the open end, trim mesh to fit (a little narrower so as not to stitch through it.
- Stitch across open end.
- Attach it to the main section, placing it about an inch below the D-ring with open sides to each side of the carrier.
- Put a slide gap in from top to bottom (instead of laying it down very flat) to allow a bit of space for inserting the backpack strap's buckle.
- Stitch across the TOP and BOTTOM, making certain to leave the SIDES open to allow insertion of the backpack waist strap.
- With the carrier wrong-side out, sew a VERY narrow seam down the sides to form the holder.
- Turn right side out.
- Fold the loose fabric (beyond the mesh) of the "lid" inwards and stitch down around the three open sides (so it doesn't flop around).
- It's done!
I had planned to sew across the end of each side on the inside of the finished carrier to create a "box" effect, but there was not enough space to do so. As it turned out, it wasn't necessary.
I am rather relatively happy with my first attempt!
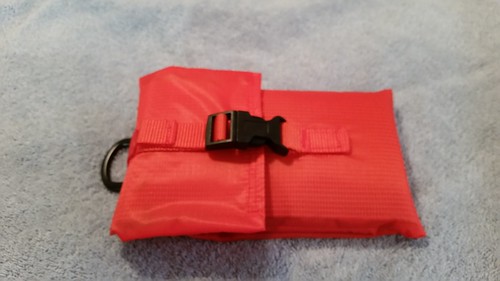
Finished Cell Phone holder:
(In these photos, I had not yet done step No. 11 above.)
Back side, showing the "sleeve" to slide the backpack waist strap through--see the slight gap:
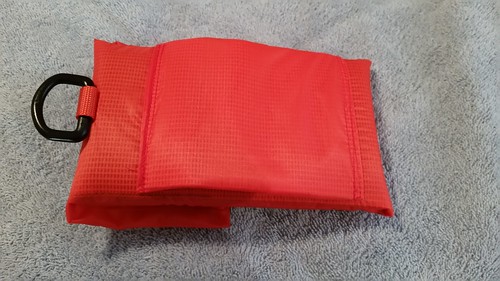
The idea of adding the D-ring came from the purchased one. It gives an addition way of attaching the carrier to the backpack, etc.
Here I slipped a strip of fabric through the "sleeve" to demonstrate how it works:

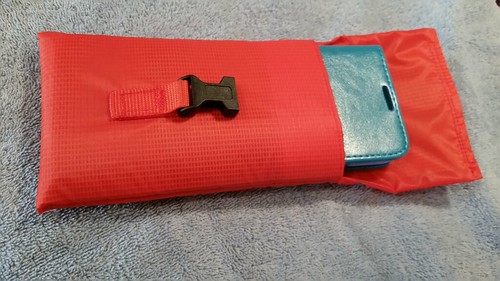
Cell phone cover slipped inside:
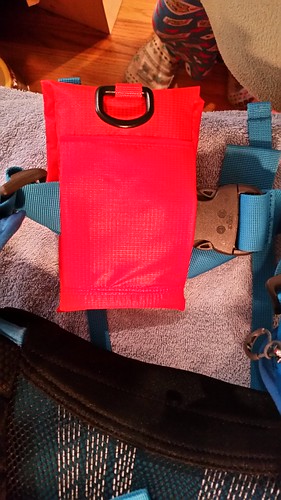
Backside view when carrier is slipped onto the backpack waist strap:
Front view -- waist strap buckled with holder in place:
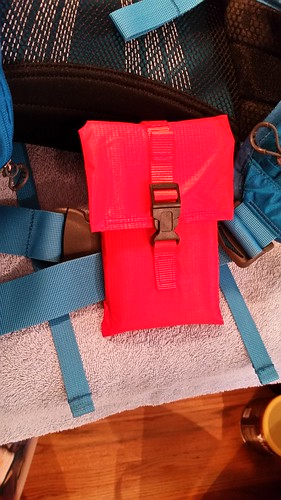
I will use it for a while and see what I might wish to add or change before making a second one. Also, it was my intent to make it just a little bit large for my current phone because they keep making the phones larger. This carrier came out fitting easily and perfectly--it really isn't quite as big as I intended for the future.
