Tuesday, July 18, 2017

What it looks like when I have to move my "stash"...

In March of 2017, we learned we had 90 days before trucks came to move us far away to our new home.  I was NOT going to let anyone else pack any of my sewing supplies, machines, or my "stash".

(Actually most of my stash was already in plastic boxes--I stored them that way, on a rack, on shelves, and stacking the big ones on the floor.)

First I took my original boxes and packed my good sewing machine and my serger.  Then I adapted a box for my old serger and cut out odd styrofoam pieces to stuff around it.  (Around each machine, I packed the parts and supplies that would fit--i.e., machine parts, bobbin collections, tools, etc.)

In other boxes I packed all of my sewing and serger machine feet, all of my thread-holder-boxes, and all the small boxes of things like zippers, elastics, velcro, buttons, ribbons, patterns, etc.  These boxes all had labels indicating the major categories in that box.

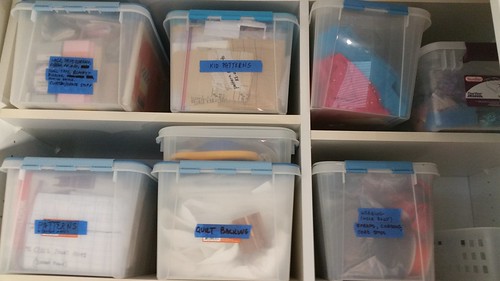
Pattern boxes, quilt backing, etc.:  (You can see the "Craft Room" blue tape labels on these boxes--every box was labelled.)

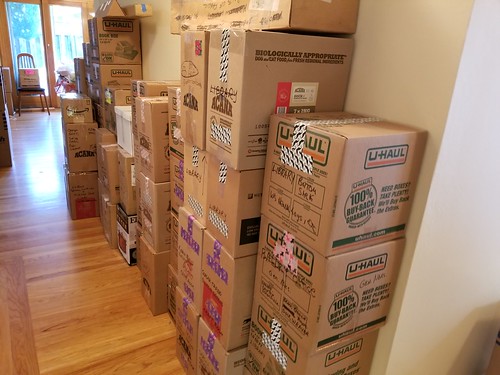
The smaller boxes ended up in this stack:  (The purple patterned duct tape was the designation for things to be taken to the Craft Room upon arrival.  You can see a lot of writing on the boxes indicating contents.)

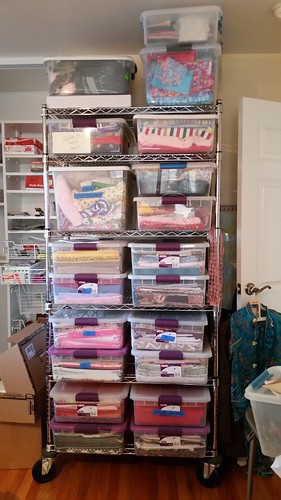
The big (permanent) rack for fabrics (mostly quilting fabrics):  (These large plastic crates were moved "as is", in stacks on the moving van.)

Some of the other crates of fabric -- flannels, and many other kinds (anything large enough was also moved "as is").
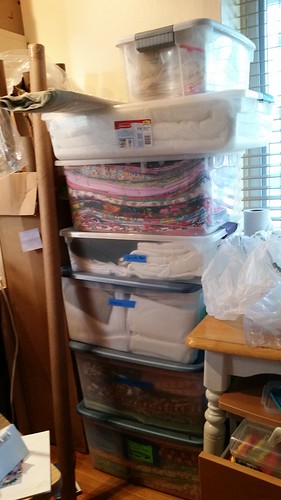
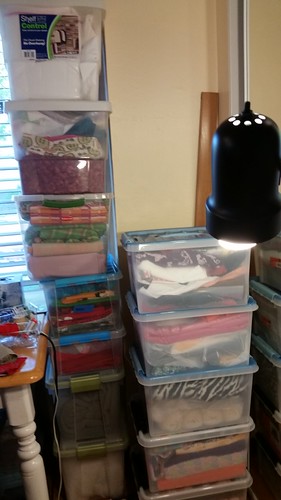


I have no photos of the iron, steam machine, sewing machine, and two sergers in their boxes.

(If you wonder why I am moving my old serger as well as my newer one, it's easy.  It's a good one, but the kind that will make you lose your religion changing threads!  I keep it threaded in white, and use my other one for all other colors and the variety of other things for which I have feet.)

Upon arrival, all of the boxes were taken to the Craft Room and the boxes went straight onto the big rack.  Other fabric boxes were piled all over the craft table, underneath it, etc., waiting for final destination.

Eventually I spent a couple of hours finding boxes whose contents would enable me to at least be able to stitch up something needed (like a temporary curtain, mending things, sewing on a button, etc.).  The labels were so well done I was able to find critical threads for all machines, machine feet, and my "tools".

In a couple of hours on another day, I began organizing my portion of the (shared) Craft Room:  (By now, it was July 18, 2017--but I was  relatively "functional"!  This space felt like heaven!)
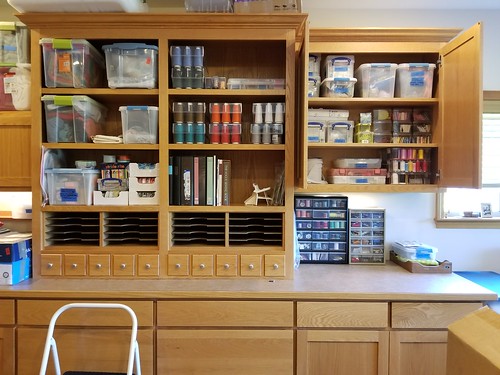

Eventually a home was found for the remaining boxes.  Yay!

Now the chore is to sew it all up, someday (when we have unpacked more stuff).

[This post actually written Jan. 2, 2019 -- there hasn't been any time!]


Thursday, May 19, 2016

YooHoo! Back again already -- Cell Phone carrier for my backpack

I searched high and low for a cell phone carrier that would attach to the front of my backpack for easy access.  The only thing I found (on Amazon) was a very heavy-duty bulky one that looks more like hunting and military use.  When it arrived, it was heavy, stiff, and I was not especially enamored with it's method of attachment.  So I decided to design my own.

I had some extremely lightweight (30 denier) silicone-coated nylon-type fabric.  I also had the heavier mesh like I use to make the mesh bags (pictured elsewhere in the blog, click on label "bag").

I hoped the carrier would be water repellent, lightweight, comfortable, easy to access, and easy to attach to my backpack.  I studied the heavy one and incorporated some of it's features, adapting it to my own desires.

I apologize, I did not take photos of the process (next time!).

I used the heavy one for a pattern and made it just a tad bigger because I wanted it to slide in and out very easily.

Both the inside and outside are made from the same fabric.  I put a strip of the mesh inside to give it a little strength and shape while retaining the water repellency.  I made the mesh smaller than the actual finished size of the carrier as I did not want the amount of bulk it would have created in any seams.

I had the D-ring on hand.  The 5/8-inch webbing came from Amazon, as did the buckle (and now I have enough buckles to make stuff for the rest of my days--still cheaper than getting what I needed elsewhere!)

  1. The case is like a "sleeve" (pillowcase) with one end closed.
    1. One long strip of fabric, folded in half and sewn down each side.  
  2. Turn it right side out and insert the mesh.  
    1. Put a basting thread on the closed end to hold the webbing in place.  
      1. The mesh is about 1/2-inch narrower than the finished size, so it was loose.
    2. Putting holes in the fabric will reduce water-repellency so use of pins was also very minimal.
    3. The fabric is very slippery.
  3. First determine where the buckle should be.  
    1. Hold it in place with webbing, adding enough length to allow for tightening.
      1. Before stitching all webbing to the fabric seal the end by holding it over a flame briefly to melt/mold it together.
    2. Stitch a fold on the open end of the webbing that stays loose after going through the buckle.  
      1. The open ended webbing is to make it possible to tighten the webbing once the cell phone is in place.
      2. The fold on the end of the webbing is to keep the webbing from sliding out once inserted.
    3. Feed the webbing through the buckle and back again, making certain to put the folded end of the adjustment strap end on the outside so you can pull it.
    4. Sew the buckle in place leaving the final length of the webbing to be determined later.  
  4. With the buckle attached, determine how much webbing is necessary to attach the D-ring on the TOP of the carrier.
    1. Seal the lose end.
    2. Use the newly sealed end to attach the D-ring, looping the webbing back over itself after stitching as close to the D-ring as possible.
    3. Stitch the webbing down--making a rectangle of stitches near the end for strength
    4. Determine the place for final finished end and trim the mesh.  
      1. Close the open end of the "sleeve" by folding the unfinished ends to the inside.
      2. Stitch close to the end, across the open end.
    5. Mark where the other end of the buckle goes, insert webbing, sew webbing down firmly.  
    6. With the D-ring in place, decide where to put the small "sleeve" for sliding the waist strap through.  
      1. This one begins about 1 inch below the D-ring.
    7. Cut the small "sleeve" and mesh for the waist strap.  
      1. This one is a finished size of about 3-1/2 inches wide (narrower than the carrier) and around 4 inches long (generous to allow for easy strap insertion).
      2. It is made the same as the rest--inside and outside are the fabric with a piece of mesh inside for strength.  
        1. Stitched and turned right side out, then mesh inserted.
        2. In this case, the mesh goes to the seams, but NOT into the seams.
        3. Fold the open end, trim mesh to fit (a little narrower so as not to stitch through it.
        4. Stitch across open end.
        5. Attach it to the main section, placing it about an inch below the D-ring with open sides to each side of the carrier.
        6. Put a slide gap in from top to bottom (instead of laying it down very flat) to allow a bit of space for inserting the backpack strap's buckle.
        7. Stitch across the TOP and BOTTOM, making certain to leave the SIDES open to allow insertion of the backpack waist strap.
    8. With the carrier wrong-side out, sew a VERY narrow seam down the sides to form the holder.  
    9. Turn right side out. 
    10. Fold the loose fabric (beyond the mesh) of the "lid" inwards and stitch down around the three open sides (so it doesn't flop around).
    11. It's done!

    I had planned to sew across the end of each side on the inside of the finished carrier to create a "box" effect, but there was not enough space to do so.  As it turned out, it wasn't necessary.

    I am rather relatively happy with my first attempt!

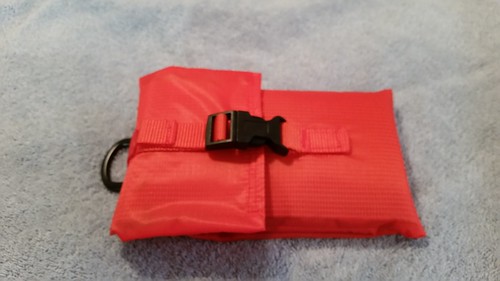
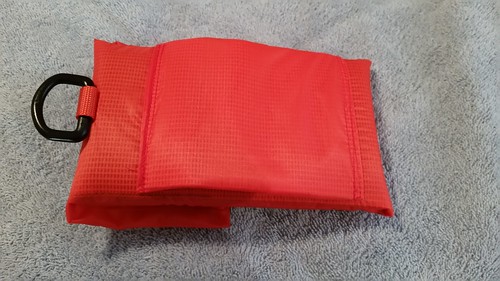
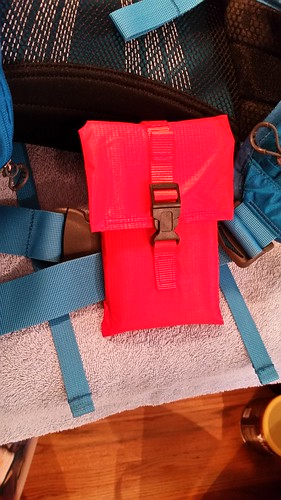
    Finished Cell Phone holder:
    (In these photos, I had not yet done step No. 11 above.)


    Back side, showing the "sleeve" to slide the backpack waist strap through--see the slight gap:


    The idea of adding the D-ring came from the purchased one.  It gives an addition way of attaching the carrier to the backpack, etc.

    Here I slipped a strip of fabric through the "sleeve" to demonstrate how it works:


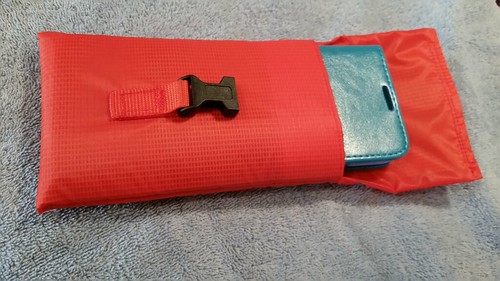
    Cell phone cover slipped inside:


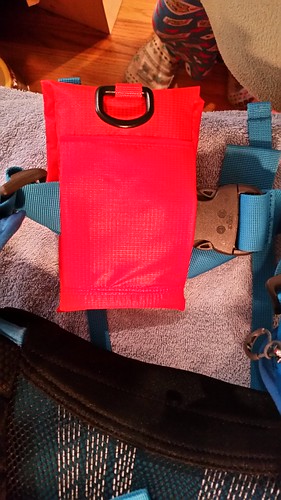
    Backside view when carrier is slipped onto the backpack waist strap:


    Front view -- waist strap buckled with holder in place:


    I will use it for a while and see what I might wish to add or change before making a second one.  Also, it was my intent to make it just a little bit large for my current phone because they keep making the phones larger.  This carrier came out fitting easily and perfectly--it really isn't quite as big as I intended for the future.


    Tuesday, May 17, 2016

    I didn't really fall ALL THE WAY off the the Planet--I just haven't been sewing. Just made more "Weelee Dresses".

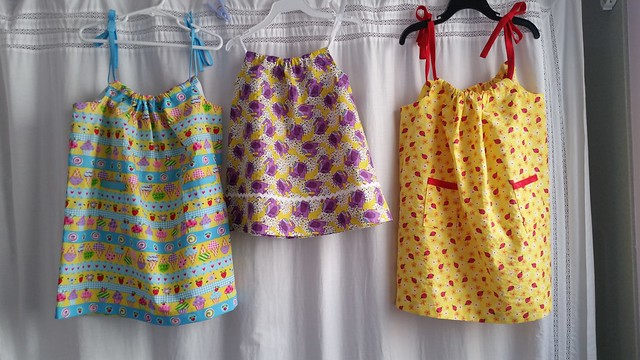
    We are heading on vacation and I needed a present for an almost two year old and almost five year old twins.  I couldn't find anything I wanted in a store, so consulted my gigantic fabric stash and came up with quickies I could fold nice and flat in my suitcase.

    For the twins, I used fabric leftovers from my granddaughter's dresses of at least five years ago.  Worked out perfectly--did not have to purchase anything at all!

    For the little one, I did purchase the purple elephants--they were irresistible and the fabric is much softer than the others.  The other's soften over time, but this started out soft.

    There are more detailed posts with a "Weelee Dresses" label.

    These are now ready to be untied, folded very flat, and packed in my suitcase:


    I just hope their moms like them!

    I'll visit you again one day, but it might be a while (unless I manage the project I'm currently attacking--a cell phone carrier to go onto my backpack waist strap).


    Sunday, September 4, 2011

    Labor Day Weekend - Not EVERY day is meant for sewing!

    Raspberry trifle our family loves!

    Dots and Circles

    (Post revised to reflect changes to dress number 1.)

    I wanted to make my great-niece a sundress/jumper from the light weight corduroy.  She's a pink girl, and loves polka dots.


    Back:

    Front yoke detail:  I had thought I might leave it plain, due to the highly patterned fabric, but it was very strange.  It looked absolutely blank, so I decided to embellish the yoke.  I wanted "stones", but buttons have to suffice because I couldn't find what I wanted.  First I tried some dark green buttons, but they were shiny, so I went back to the store and got these.  (The color is not really true here, especially for the buttons.)

    Later I decided I just couldn't handle those buttons, so I got some varigated glass beads of avocado and cream.  Somehow I failed to take a photo of those, which I regret because I preferred them.

    Then I showed it to my daughter who declared the avocado circles were NOT avocado; she said they were taupe.  (I still disagree.)  So we went back to a bead store and found these.  (By this time I had put four sets of things into the yoke and was getting quite concerned about all those holes.)

    Front number 4 (final):

    It looks nice, and because of the busy print, it is somewhat a shame that anything was required on a garment for a 5-year old.  It will have to do.

    Final finished front:

    There were small pieces of fabric left over, so I decided to see if I could get a similar dress for a small sweet girl I know out of the remainder.  Sure enough, I could get pieces long enough for a top, and across one end was just enough to make a "lower skirt".

    I attached the "lower skirt" and put a row of baby ric-rac over the seam.

    When the skirt was done, I found I had enough length to turn it up to meet the seam (completely hiding my hem stitches).  First I put a "permanent hem" in at the bottom, then turned it up and used a "knot stitch" to attach it to the back of the seam where I attached the "lower skirt".  I steamed it a little and pressed down with my hand, but I did not "press" down the hem with the iron, in hopes of causing fewer issues later when it is lowered.

    When she grows, her mommie can take out the knot stitches.  If she wants the full length, the hem is already finished.  If she wants less, she can hem it where she likes.  I included the remaining ric-rac so she could cover the line it will leave where the current hem is folded.

    I added ric-rac on the yoke to match the skirt. 

    Back view:

    For this one, I used matching pink buttons to embellish the yoke.  (After my long tale, I rather wished I had used pink buttons for the one for my great niece, above.)

    Finished dress:  (This is probably the truest color.)

    I like them both!  I already know the little one's mommie loves the dress, and I know my niece loves the fabric, so maybe it's a winner...

    [My niece says her daughter likes the dress; I'm not so sure the Mom is crazy about the finished garment.]